How to Build a Brand Kit from Scratch in 10 Minutes (Even Without a Designer)
A brand kit is a single, reusable set of assets and rules — your color palette, fonts, logo files, and tone of voice — that keeps every design you make looking like it came from the same brand. You can build a usable one from scratch in about 10 minutes, and you don't need a designer to do it.
If you've searched for "how to create a brand kit," you've probably seen advice that assumes a five-figure agency budget. This is the practical, do-it-yourself version: clear rules for choosing colors, pairing fonts, using your logo, and defining tone — plus a checklist and a way to store it all so every future design stays on-brand automatically.
What goes in a brand kit
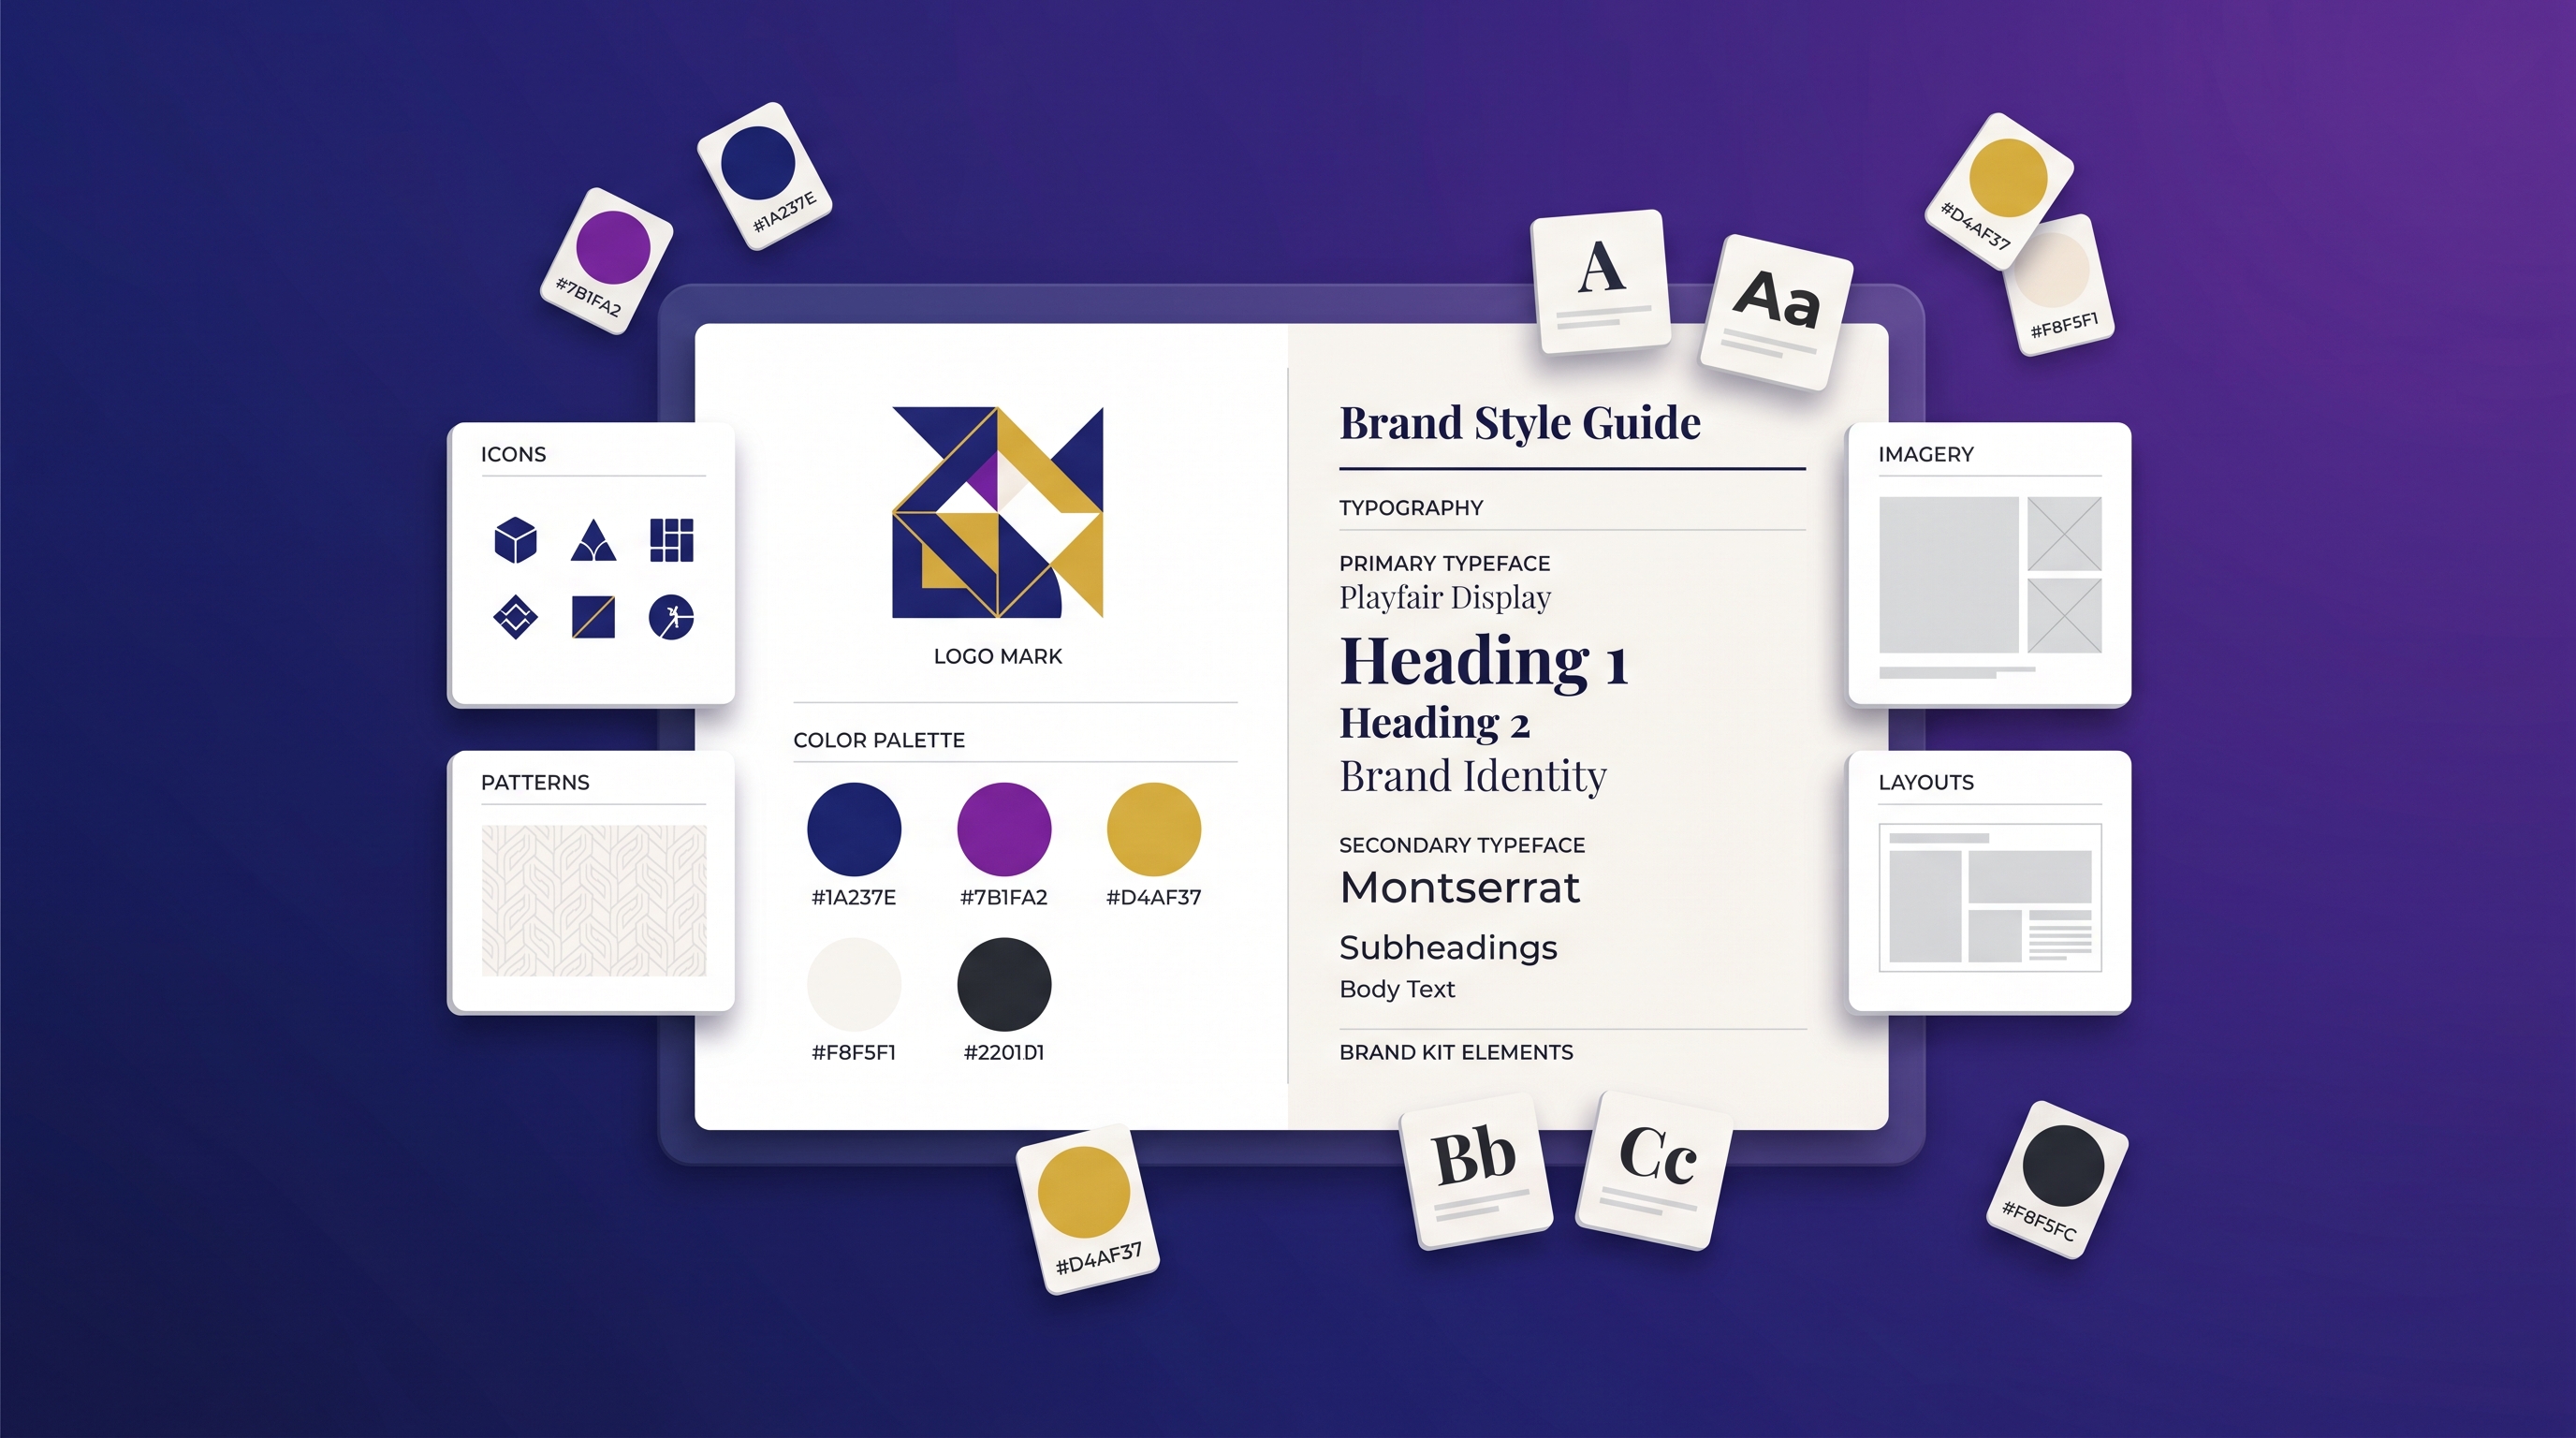
At minimum, a brand kit answers one question for anyone making something for your brand: "What do I use, and how?" That breaks down into four parts:
- Colors — your palette and where each color is allowed.
- Typography — which fonts, at which weights, for which jobs.
- Logo — the files and the rules for using them.
- Tone of voice — how the brand sounds in words.
Get these four right and you have a working brand identity. Everything else (icon styles, photography direction, motion) is a nice-to-have you can add later.
Step 1 — Choose a color palette
A clean palette uses three roles. Pick one color for each:
- Primary — your main brand color, used most often (buttons, headers, accents people remember you by). Why: this is the color people associate with you.
- Secondary — a complementary color that supports the primary without competing. Why: it adds range so designs aren't monotone.
- Accent — a high-contrast pop used sparingly for CTAs and highlights. Why: it draws the eye exactly where you want action.
Add two neutrals — a near-black for text and a near-white for backgrounds — and you have a complete five-color system. Keep accent usage under roughly 10% of any design so it stays attention-grabbing.
Step 2 — Pair your fonts
You need only two fonts. Follow these rules:
- One display/heading font with personality, and one clean body font for readability. Why: contrast between them creates clear hierarchy.
- Pair a serif with a sans-serif, or two clearly different sans-serifs — never two fonts that look almost alike. Why: near-identical fonts look like a mistake, not a choice.
- Assign jobs: heading font for titles only, body font for everything else. Why: consistent roles keep layouts predictable.
- Set sizes and weights — e.g., bold 32 px headings, regular 16 px body. Why: defined scales stop designs from drifting.
When in doubt, fewer fonts is always safer than more.
Step 3 — Set logo usage rules
Your logo rules don't need to be long, just clear:
- Provide the files you'll actually use: a full-color version, a single-color version, and ideally a transparent PNG plus a vector (SVG).
- Clear space: keep a margin around the logo equal to roughly the height of its main letter, so nothing crowds it.
- Minimum size: define the smallest it can appear and still be legible.
- Don'ts: never stretch, recolor outside the palette, or add effects.
Step 4 — Define your tone of voice
Tone is the part most DIY brand kits skip, and it's why their content feels generic. Write three to five adjectives that describe how your brand speaks (e.g., "warm, plain-spoken, lightly witty — never corporate"). Add one "we say / we don't say" example so the rule is concrete. This is what makes content actually sound like you instead of like everyone else.
The 10-minute brand kit checklist
- Primary, secondary, and accent colors chosen (plus text + background neutrals)
- Hex values recorded for all five colors
- Two fonts selected and assigned to headings vs. body
- Type sizes and weights defined
- Logo files exported (color, mono, transparent, vector)
- Logo clear-space and minimum-size rules written
- Three to five tone-of-voice adjectives written
- One "we say / we don't say" example added
Tick all eight and you have a real, usable brand kit.
Store it once, stay on-brand forever
A document is fine, but the friction is real: every new design means re-finding the right hex codes and re-uploading fonts. The fix is to store your brand kit inside the tool that makes your content.
Meepo keeps a brand profile that stores your colors, fonts, logo, and guidelines, then applies them automatically to everything it generates — posters, social posts, carousels, ad creatives, and captions. Set it up once and every future asset comes out on-brand without you re-specifying anything. The free plan includes one brand profile and 20 credits with no credit card; paid plans add multiple brands (3 on Pro, 5 on Team) for agencies and multi-client work.
Because Meepo is also a design MCP server, you can even apply your brand kit from inside an AI chat. Connect Claude, ChatGPT, or another MCP agent to meepo-mcp-server.meepo.app/mcp and ask it to generate on-brand designs in plain language — setup is in the Meepo MCP guide. Once your kit lives in a brand profile, the natural next step is using it to generate an on-brand Instagram carousel in seconds.
Free vs. paid: tools for building a brand kit
| Need | Free / DIY route | Paid / built-in route |
|---|---|---|
| Color palette | Free palette generators (Coolors, Adobe Color) | Stored in a brand profile, auto-applied |
| Font pairing | Google Fonts (free) | Stored and assigned per design |
| Logo | DIY in a free editor or a simple wordmark | Uploaded once, reused everywhere |
| Keeping designs on-brand | Manual — copy hex codes each time | Automatic across every generated asset |
| Multiple brands/clients | Separate docs per brand | 3–5 brand profiles on Pro/Team plans |
| Cost | $0 + your time | Free tier available; from $8–20/mo |
For a solo creator with one brand, the free route is completely viable — Google Fonts plus a palette generator costs nothing. The paid, built-in route pays off the moment you're producing volume or juggling multiple brands, because it removes the repetitive step of reapplying your kit to every single design.
FAQ
What is a brand kit?
A brand kit is a reusable set of assets and rules that keeps everything you create visually and verbally consistent. At minimum it contains your color palette, your fonts, your logo files, and your tone of voice. Anyone designing for your brand can open it and immediately know what to use and how to use it.
How many colors and fonts should a brand kit have?
Use three brand colors in defined roles — primary, secondary, and accent — plus two neutrals for text and backgrounds, giving you five in total. For type, two fonts is ideal: one for headings and one for body text. Keeping the counts small is what makes a brand look intentional rather than cluttered.
Can I build a brand kit without a designer?
Yes. With free tools like a palette generator and Google Fonts, plus a simple wordmark logo, you can assemble a working brand kit in about ten minutes. The four essentials are colors, fonts, logo rules, and tone of voice. A professional designer adds polish, but the core kit is well within reach for anyone.
What is tone of voice in a brand kit?
Tone of voice is the set of rules for how your brand sounds in writing. It is usually three to five adjectives, such as warm, plain-spoken, and lightly witty, paired with a short example of what you do and do not say. Defining it is what makes your content sound like your brand instead of generic copy.
How do I keep every design on-brand after building a kit?
The most reliable way is to store your brand kit inside the tool you design with, so colors, fonts, and logo apply automatically. Meepo does this with a brand profile that it applies to every poster, post, and carousel it generates. That removes the manual step of re-entering your colors and fonts for each new asset.
Is a free brand kit good enough, or do I need to pay?
For a solo creator with a single brand, a free do-it-yourself kit built from palette generators and Google Fonts is completely sufficient. Paid, built-in options become worth it once you produce designs at volume or manage several brands, since they apply your kit automatically and support multiple brand profiles. Many tools, including Meepo, offer a free tier so you can start at no cost.
Ready to automate your design workflow?
Try Meepo free — AI generates designs instantly, human designers polish to agency quality.
Start Free